Car Camping Adventures for Families

A blog detailing the ins and outs of car camping with children throughout the Carolinas region and beyond. Learn about kid friendly campgrounds, fun camping activities and healthy, tasty camping food that your kids will love!


Friday, February 26, 2010

Trail Mix Musings

Inspired by a fellow blog reader, I decided to do a post on trail mix.  And honestly, what's not to like about trail mix?  It's healthy, it's fun, it's versatile, and it's easy to make.  There are so many ways to make trail mix that you could create a different mix every day for a year and still not run out of choices to make it unique.  All this talk is making me hungry so let's get started!

Trail Mix typically consists of dried fruits, nuts, grains, seeds, and sometimes chocolates. It was originally created for the outdoor enthusiast because nuts and fruit offer a good combination or protein and sugar to keep you energized and moving forward.  Today, it's eaten everywhere from the great outdoors to the office for a mid afternoon pick-me-up.  Some common ingredients that tend to be in most trail mixes include peanuts, raisins, almonds, cashews, and M&M's.  But why stop there? There are so many great additions that you can add to make a trail mix your own personal favorite.  How about dried cherries?  Sunflower seeds?  Or maybe yogurt covered raisins?  The possibilities are endless.

When I set out to make a trail mix, I typically like to head over to my local natural foods store where I can find bulk bins with all my favorite ingredients.  This way I can get a little or a lot of each ingredient and save money while doing it because I only buy what I need. Sometimes they have pre-made trail mixes in the bins as well if you'd rather just get something that's already been mixed.  Here in Charlotte I tend to like Healthy Home Market as they have the largest selection of bulk bins in the area.  Find something similar in your area and check it out.

If you want to go a bit more gourmet you can visit one of several online "create your own" trail mix shops including Nutty Idea and You Trail Mix.  You can also make trail mixes that have a bit more substance to them, such as a coating of yummy goodness that gives them additional flavor.  Here are a couple gourmet recipes to try the next time you're looking for something a little different!

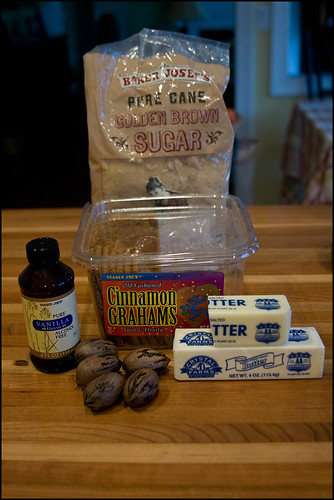
Carmel Goodness Trail Mix

9 Cups of Rice Chex Cereal
1 cup of brown sugar
1/2 cup butter (1 stick)
1 tsp vanilla
1/4 tsp baking soda
1/4 cup maple syrup
1 cup each of your favorite mixings (ie. nuts, dried fruit, or chocolate)

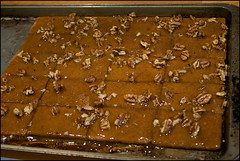
Spread cereal on a greased baking sheet.  In a medium sauce pan melt butter.  Add brown sugar, maple syrup, and vanilla and bring to a boil.  Boil for one minute, stirring constantly.  Remove mixture from heat and stir in baking soda.  Pour mixture over cereal and stir until all pieces are coated.  

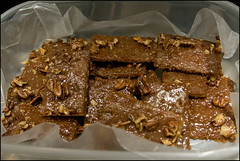
Place mixture in a preheated 250 degree oven for 40-50 minutes, stirring every 15 minutes. Pull out of oven and let cereal cool for 5 minutes.  Then stir in addition mixings.  Allow to cool completely and then break into chunks.  Store in an airtight container.  Enjoy!


Very Cherry Trail Mix

1 Cup of uncooked Oats
2/3 Cup of Chopped Dried Cherries
1/4 Cup Chopped Almonds
1/4 tsp Salt
1 Tbsp Butter, melted
1/4 Cup Honey

Grease a large jelly roll pan.  In a large bowl mix together oats, cherries, almonds and salt.  Pour butter and honey over the top of mixture and stir until evenly coated.  Spread evenly onto greased pan.  Place in a 350 degree oven for 20 to 25 minutes stirring occasionally.   Let Cool.  Break into pieces and store in an airtight container.  Enjoy!


Sunday, February 21, 2010

Getting out locally

Not every weekend can be dedicated to camping, but that doesn't mean you can't get out and experience nature in your local area on a regular basis.  In a time of never ending tv, video games, cell phones and the like, it's important to set aside time for kids to get outside and explore their surroundings away from all the noise of modern technology.  There are so many great areas for getting out of the house and exploring, and chances are, there are many places in your own town that you don't even know of yet.  Make it a challenge to find one new place that you've never been before.  Ask friends and  neighbors where they enjoy spending their outdoor time.  Check around for local outdoor clubs, look in the local paper for outdoor activities or check out your local library for nature books relative to your city or state.  I know that after searching online for outdoor venues in Charlotte, I stumbled upon several clubs and outings that I hadn't even known existed until I took the time to research them. 

Our family's favorite local outdoor activity is to visit our local greenways and explore the outdoors while we walk.  For my boys, every visit is a new hike.  My oldest enjoys treasure hunting while we go. He's found intact beetles shells, bird feathers, frogs, and more.  My husband and I enjoy the feeling of being outside and the sense of renewal it gives us.  Nothing lifts the spirits more than a walk in nature. 

The entrance to McMullen Creek Greenway in Charlotte

So the next time you're sitting around on a Sunday afternoon with your kids begging to play the wii yet again and wondering what to do with your time, get out and enjoy the day.  Even if it's just a walk through your neighborhood.  You'll be amazed at how much better you feel and at the same time, you'll be teaching your children more about the world around them and how to have fun in the outdoors without the use of an ipod, cell phone or game boy.

Some local outdoor opportunities in Charlotte include:


Charlotte Greenways
The Charlotte Outdoor Parents Meetup Group
Charlotte Park System
Charlotte Nature Preserves


Thursday, February 18, 2010

The Great Backyard Bird Count

I recently read about The Great Backyard Bird Count (the day after it ended of course) and thought what a fun idea this would be for kids to participate in.  While it's too late to take part in the official count this year, it doesn't mean you can't do your own count for fun (and shhhh.... educational purposes).   Head to the website and grab a regional checklist to get a list of birds common to your area.  Do it in your backyard in the winter and then again in the summer to see how your list differs with migrating species.  Take a list with you camping and see what types of birds are at the campground you're staying at.  You can even print out lists created specifically for National Parks and Lands.

The website itself also has a lot of great information on how to properly ID birds, including a comprehensive bird guide with pictures, sounds, maps and more.  It's a great way to get up to speed now, so that when you do head out to the campgrounds with binoculars in hand, you know your birds as you see them.  Happy Birding!

Tuesday, February 16, 2010

Camping out West

It's the middle of the winter and too cold for kid camping, so I thought I might head back in time a bit and post about a few parks out west that we went to pre-kids.  Please forgive the picture quality.  My oldest is almost six years old, so I had to dig into some pretty old boxes to find these pictures.

Zion National Park

We camped at this park for three nights and really liked it.  We stayed on the Watchmen loop although both the South loop and the Watchmen loop were nice.  There are no showers at this park, but they do have clean drinking water and bathrooms.


My favorite part of this park was hiking the Narrows, although I will say that this is NOT a kid friendly hike unless your kids are able to hike on their own and are good swimmers.  You hike up a narrow canyon through a shallow running river.  The scenery along this hike is breathtaking.  It is a total of 16 miles long and takes about 13 hours to hike in it's entirety.  There were plenty of backpackers that were going the entire way and camping as they went, but we only hiked about 31/2 miles in and then turned around and went back out. I would definitely love to go back and hike the entire length one day.


Bryce Canyon National Park

Even though we didn't spend the night at this park, I felt it deserved a shout-out. This is by far, one of the neatest parks I've ever visited. When walking through it, you literally feel like you've entered The Flintstones. It's not a big park, but it's definitely memorable. You can see most of it in one day if you're not planning any major hikes. 


While we didn't experience either of these parks with kids, they are both kid friendly and offer shorter hikes for the younger crowd in addition to junior ranger programs for kids aged 6-12.  These parks are located in Southern Utah and you can learn more about them at their websites: ZION and BRYCE


Sunday, February 14, 2010

Toffee Crackers

A fellow MOPS mom made these one morning for our breakfast brunch and I thought they were delicious so here I am sharing them with you today. These easy to make treats can be made before you head out to the campground for a quick dessert or midday snack.

Ingredients you'll need:

5125blogpictoffeecracker

Line up 20 graham crackers on a jelly roll pan. Then, add a stick and a half of butter and 3/4 cup of brown sugar to a small saucepan and bring to a boil on medium heat. Let boil for two minutes stirring occasionally. Add one teaspoon of vanilla and 1/2 cup chopped pecans. Remove butter mixture from heat and spread over graham crackers evenly.

5126blogpictoffeecracker

Place in 350 degree oven for 10 minutes. Let cool completely and break into pieces. Enjoy!

5134blogpictoffeecracker

Saturday, February 13, 2010

Hiking with children

I don't know about you, but in our pre-kid days, my husband and I loved to get outside and hike.  We'd hike six miles up a 14,000 foot mountain in Colorado and be ready for more.  While it's true that you probably won't be hiking too many 14'ers with small children in tow, it is still possible to enjoy a hike with kids if you set realistic goals and go into it prepared and with an open mind.

1.  Make sure you pack plenty of snacks for the trail. 

 I can't tell you how important this first tip is.  Kids get hungry.  Heck, adults get hungry too.  If you don't have multiple snacks with you, you may find that your hike is much shorter than you wanted it to be.  There are so many great, quick snack ideas for the trail.  I'll get a better list together in a future post, but for some quick ideas think trail mix (make your own and be creative!), dried fruit, fresh fruit, dried cereal, granola bars, cereal bars, cheese sticks,etc.)

2.  Plan to make multiple stops. 

Kids go at their own pace and they need more time to complete a hike then we do as adults.  Recognize that and plan it into your hiking time.  When my husband and I are researching which hike to take, we'll look at the description to see if we can envision good places to stop and take a break.  Ponds, waterfalls, views... these are all good places to stop and let the kids take a break for a minute.

3.  Find activities or create games to make hiking fun.

Creating some activities or games to hold the interest of your child on the hike can not only buy you extra time to hike a little more of the trail, but it can also make the experience more fun for everyone.  There are so many ways to have fun with your kids while hiking.  Try finding the alphabet within your surroundings or sing songs while you hike.  Assign a color to each child and see how many times they can spot their color along the trail.  Have a trail scavenger hunt where you create a list of items to find along the trail - certain flowers, birds, features, etc and see who can complete their list.  Find and decorate your own walking stick before heading out on the trail.  Most of all, just have fun!

4.  Bring a carrier for backup.

We have a five year old a four year old and a one year old.  It's a given that the one year old will ride in a back pack.  Up through this past summer, we also brought a carrier for our then 3.5 year old as well.  We would always let him start walking and make several stops, but if he got too tired, the carrier was there for him to take a break.  I realize that a 3.5 year old is heavy, so either way, a hike will more than likely be a bit shorter than it would be if your children were babies or of the older crowd, but having a carrier at that age, can definitely get you farther on the trail and can be a lifesaver if you get halfway out on the trail only to have your child proclaim that he is done hiking and can't walk another step (been there done that.).

5.  Be prepared to not go as far as you planned. 


Don't be disappointed if you don't get to hike as long as you were hoping.  This was such a tough one for me the first few times we went out hiking with our children. I'd get all excited about a hike and darn if I wasn't going to finish it.  But as parents we have to remember that hiking is a skill and kids need to learn how to hike for longer stints. Don't get frustrated if you don't get as far as you'd like the first time.  Keep it fun, keep trying, and your kids will keep wanting to go out and hike more.  You'll be instilling a love of the outdoors in your children and before you know it, you'll be working to keep up with them! 

6.  Enjoy the Journey!

Prepare yourself for the fact that your hike will most likely not be as long, nor will it be as fast.  Small children are just that, small.  Instead of looking at this as a detriment, look at it as an opportunity to explore your outdoor surroundings.  Sometimes as adults we focus more getting to the finish line than on the journey we take to get there. One of the best parts of having children is their ability to help us slow down and smell the roses.  While I do miss my longer hikes, I've learned to find the beauty in seeing the outdoors through my children's eyes and I know they are better for it!

 
Hiking with our three year old in the pack

Friday, February 12, 2010

Gear Talk

Ok, let's talk gear today.  We currently have an eight man tent that we love; it's the Cougar Flats by Columbia.  


We researched and researched and chose this one for several reasons.  First off, we needed lots of space for our three boys but still wanted high quality at an affordable price.  An eight man tent seemed to be the perfect size for us.  The reviews on this tent from other families were great which is always a big selling feature with us.  One thing we liked in particular about this tent was that it claimed to allow good airflow through the tent which I definitely think it does.  The tent itself has two rooms, one room that has windows that can be closed or opened and little openings at the bottom that are protected from water but that can be left open for ventilation (love these).  It also has a hook in the ceiling for a light which is nice.  The second room's walls can be closed up if it's cold or the sides can be rolled up to create a screened in porch if it's nice out and you want the air flow.  This room has been perfect for the baby.  We are able to put the pack-and-play in there and he can see us and still be a part of the action without being bothered by biting insects. 

My only small issue with this tent was Columbia's customer service.  Our first time setting up the tent, we discovered  that one of our roof poles was broken (I know, I know, we should have set up the new tent before we left - always set up a new tent before you head out to make sure you know how to set it up and know that everything is in working order!).  We created a fix for the trip and when we got home we called customer service.  Columbia's customer service at the time we called was being run by a different company so we had to jump a few hoops to get our new pole.  We did finally get a new pole and it's the correct size so I'm guessing it will work fine, but it wasn't a pole that came from that tent.  Despite this small glitch, I still love this tent and I think it will be our main outdoor residence for some time to come.

Now of course, as soon as we bought the eight man tent, our four and five year old decided they wanted their own tent to sleep in.  So we pulled out our old four man tent from our "before children" days and they have used that and love being "big kids" in their own tent.  You can see a pic of the two tents set up together in the slide show.  In order to make the transition easier to the boys being in their own tent, we bought them a flashlight/nightlight.  My husband looked around at different choices but in the end he decided on the Coleman Companion Flashlight with Light Show.


The kids love that it's not only a flashlight but it can also do different series of colored lights in the tent at night.  We still get visitors in the big tent on rainy nights, but on a nice clear night, the boys love having the four man tent to themselves.


Thursday, February 11, 2010

Finding Alphabet Letters in Nature

Sometimes keeping small kids entertained at camp can be a challenge.  One activity that my boys enjoy when we're camping, be it while we're hiking or when we're just hanging out around the tents, is finding Alphabet letters in nature.  If you've never done it, be sure to try it the next time you're outside with your kids.  You can simply look for random letters and see what you find (a better way to do it with smaller kids who are still learning their alphabet) or you can make it a game and see who can get to the end of the alphabet first.  For a lasting memory, give each child a camera and let them take pictures of the letters they find.  This activity is a fun, easy way to explore and learn more about nature and your kids will love discovering the secret letters that are hiding right in their own backyard.

Picture borrowed from Discovering Natures Alphabet by Krystina Castella and Brian Boyl

Wednesday, February 10, 2010

Easy Peasy herbed fish

This is an easy and tasty recipe that is great for camping; especially for your first night there after you've put all your energy into unpacking and setting up camp.  It can be put together the morning of and marinate all day while you're driving and setting up camp.  My kids love fish, so this goes down quick with everyone cleaning their plates and asking for more.  I've used sole in these pictures, but this will work for everything from salmon to catfish.  Pick your favorite!  Here are the ingredients you'll need:

5102blogpic


And I have to apologize to my friends salt and pepper.  I forgot to add them to the picture.

5103blogpic


Grab yourself a gallon size freezer bag and add to it the juice of one lemon, 1/4c olive oil, 1/2 tsp of dried basil (fresh is super yummy as well and I use a 1:3 ratio when going between fresh and dried so if you use fresh chop up 11/2 tsp of fresh basil), 1/2 tsp of dried parsley (again, 11/2 tsp if using fresh), two crushed cloves of garlic (finely chopped if you don't have a garlic press) and salt and pepper to taste. I typically put about 5 or 6 good shakes of each.  Mix it all up in the bag, put in your frozen fish fillets(yes you heard me correctly, you can take them straight out of the freezer and put them in the marinade bag) and seal it up making sure to get all the air out.

5104blogpic


Throw it in your iced cooler and you're done!  That evening when you're ready to cook dinner, pull out the fish fillets.  They should be thawed but cold at that point.  Throw them into your camp stove cooking pot, juice and all, on medium high heat and cook em up.  With white fish such as sole and catfish, this should take about 5-7 minutes and with thicker fish such as salmon, expect it take around 10 minutes. Pull it out of the pan and serve it with a veggie and carb and you've got a yummy dinner!  On our last trip I steamed up some spinach and we had a store bought focaccia bread that I had bought the day before.  Enjoy!

Tuesday, February 9, 2010

First Landing State Park

We ventured to First Landing State Park in Virginia the first weekend in August of 2009.  We were on our way to Ocean City and figured it would be a nice spot to stop for a few days and attempt to camp with all three kids.  The campground has a full service bathroom including hot showers, a visitor's center with several different activities for the kids, walking access to the Chesapeake Bay with a swimming area, and easy driving access to all the sights and sounds of Virginia Beach.

We spent two nights here and loved it!  First off, I would recommend that for tent camping, you choose either loop A or loop B.  In my opinion, these were the best options.  Some of the sites in these loops were really big and the trees were so neat!  Many were easily climbable for my older two who were three and five at the time.  On the right side as you drove toward into the campground, the sites backed to the main road although you couldn't really see it because the sites were big enough to block the view.

We set up two tents; a very large eight man tent and a somewhat smaller four man tent.  The older boys had decided they wanted to sleep in their own tent and we still had a four man tent from our "pre-kid" days so we brought it along.  The first night it rained so the kids slept in the eight man tent with us.  The next night they got a bit braver and slept in the four man tent together.  We had bought them a special flashlight/nightlight that made the nighttime a bit more fun in the tent.  The baby slept in the big tent with us.  At six months old he wasn't crawling or sitting yet, so we brought a crib mattress for him and laid it at the end of our blow up mattress.  It worked out really well and gave me easy access to get to him in the night if I needed to.  He is, of course, crawling now at one year old and will maybe even be walking by our spring trip, so we're going to take along a pack and play in the spring for him to sleep in and hang out in while we're at camp.

The first full day we were there, we enjoyed a breakfast at camp and then my husband took the older boys to a few of the visitor center activities while I stayed back with the youngest while he took a nap.  They played games from the colonial times and took a nature walk.  In the afternoon after the baby woke up, we all ventured back down to the visitor center, toured around the museum and checked out the beach.  That evening my husband took the older boys out for a nighttime nature walk, once again sponsored by the visitor center - that was a big hit!  Our second full day was mostly spent at the beach.  First Landing has such a nice beach with quiet waves and easy water for the little ones.  The ranger had set up a station on the beach with different aquatic wildlife found in the Chesapeake so the kids could learn a bit about the inhabitants.  They even provided nets so you could do a little aquatic exploration of your own!

All in all it was a top pick for a family camping destination.  Everyone had a great time and we didn't even begin to touch all the activities that can be done here.  Things we hope to try on our next visit include hiking and biking on some of the many trails available to visitors.

Welcome!

I'm so excited to be starting up a blog on camping with children!  My husband and I have always loved camping and getting into nature.  We were avid outdoorsmen (and women) before having children.  Once our first child came though, we were unsure of how it would change camping.  We ended up taking a few years off from our adventures because we weren't sure of the best ways to make it work.  But now, three children later and living in an area much more conducive to camping (we lived in the Dallas area before; it was always too hot or too cold for camping it seemed - especially with small children), we've decided to take the plunge and get back into camping.  We attempted our first camping trip to First Landing State park in Virginia Beach last summer when our youngest was only 6 months old and it went so well we weren't sure what we had been afraid of the entire time(more on that in the next blog post)!  With that first experience under our belts we are now ready to jump in full force.  We have three trips planned so far this year: a spring trip to Huntington Beach State Park, an early summer trip to Stone Mountain, and a Labor Day weekend trip to Linville, NC (aka Grandfather Mountain).  More trips may be added as the camping season progresses.  Our spring trip is scheduled for Easter weekend, so stay tuned for recipes and activity ideas as we get ready to head south in just a few short weeks!