Car Camping Adventures for Families

A blog detailing the ins and outs of car camping with children throughout the Carolinas region and beyond. Learn about kid friendly campgrounds, fun camping activities and healthy, tasty camping food that your kids will love!


Sunday, July 11, 2010

Fish Tacos with Marinated Slaw

Here's a yummy camping treat that I whipped up for our most recent trip to Stone Mountain.  If you haven't guessed it yet, I love to marinate fish and cook it up the night we get there after setting up camp.  All the legwork is in the marinades and that can be done at home before you even get to the site.  So by the time you're ready for dinner; tired from driving and setting up camp, all you need to do is pull out your marinated dinner and grill it up.  Easy peasy.

To top it off, this meal is tasty, healthy, and quick to clean up.  If you're looking for something a bit different from typical camp food, read on.  Here's what you'll need:


For the Fish Tacos:


1/4 Cup of Olive Oil
1 Tbsp of Honey
2 tsp of Cilantro, Chopped
2 tsps of Garlic (2 Cloves), Minced
1/2 Lime, Juiced
A Few Good Shakes of Salt and Pepper
(Approx. 1/8 tsp of Pepper and 1/4 tsp of Salt)
1 Pound of White Fish (I used Mahi Mahi) still frozen

The morning of your trip, mix all of your ingredients into a zip lock bag and add in your frozen fish.  Make sure you coat the fish completely and then throw it in your cooler.  When you take it out later in the evening it will be thawed cold and marinated, ready for the grill. 


Once you're ready to cook up dinner, grab your fish and throw it on the grill. I placed a piece of foil on my camp grill because I wanted to lessen clean up, so that's what you're seeing in the pictures.  Here's the fish halfway through:


And here it is all cooked up and ready to be "tacoed".  Check out those grill marks!  I feel like Bobby Flay's long lost cousin.


 Now let's whip up the marinated slaw that goes with this beautiful fish:


6 Oz. of Shredded Cabbage
1 Carrot, Julienned
1/4 Cup of Rice Vinegar
1 tsp of Lime Juice
2 Tbsp of Olive Oil
4 tsp of Cilantro (1 Small Bunch Chopped)
Salt and Pepper to Taste

The morning before leaving, mix together the vinegar, lime juice, olive oil and cilantro.  Place it in an airtight container and throw it in your cooler.  Pack the slaw and marinade separate, and then add in the veggies just before serving the night of.  Here's mine mixed together in my dutch oven.  And in case you're wondering where my carrot went, it went no where.  I completely forgot to pack it in the cooler.  Boo.  It was still good without it, but let this be a lesson, Don't Forget the Carrot!!


Time to assemble!  We added a little Trader Joes salsa to the mix as well, just to kick it up a notch.  We also served a little Trader Joes seven layer dip with tortilla chips (yes I am a TJ addict with no intention of stopping any time soon).


These were so tasty, I didn't even think about taking a picture of the finished burrito until I had taken a taste test (or three).  Here's the inside of the burrito for your viewing pleasure. What are some of your favorite "go to" camping meals?  Share them below!

Grab a Copy of the Recipe HERE.


Sunday, June 6, 2010

Stone Mountain State Park, North Carolina

Camping trip number two is officially under our belts.  We decided to head to Stone Mountain State Park in North Carolina for our Memorial Day weekend holiday.  

If you haven't visited this park before and live in the area, you should consider it for a quick family camping getaway.  The campground itself was very nice.  The pads were decent sized, the majority of them were wooded, and the bathrooms were well maintained with hot showers and a nice large sink for cleaning dishes.  

If you like a bit more privacy, I'd recommend campsites 10-24 as my top choices.  All of these sites are wooded and back to more trees vs. more campers.  The only ones I wouldn't recommend are 1, 2, 3, 5, 6, or 8 as they back to the RV section of the park and have a fairly steep drop off which I wouldn't have felt comfortable with having small children.

There were plenty of activities to entertain the kids as well.  Be sure to bring your swimsuits and your fishing poles.  We, of course, forgot both, but still managed to make do and have a fun time in the water. Some of the highlights of our trip were hiking to the top of Stone Mountain and playing in the waterfalls and slides that exist naturally in the park.  There are also some really great ranger led activities in the summer time as well as some great trout fishing for the anglers in your family.

Here are some pictures to share from our trip to give you a better idea of what the park has to offer.

Setting up Camp.  You can see the bathrooms in the back.  We were on pad 7 and had about 1000ft. between us and the showers.


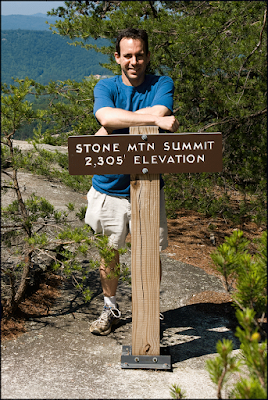
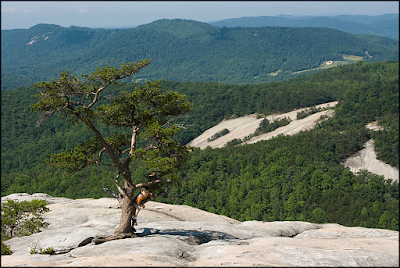
Hiking to the top of Stone MountainThere were a whole lot of steps on this hike.


Enjoying some waterplay at the waterfalls.  You can see the natural slides on the left side.  Kids were wearing plastic bags on their bottoms to slide faster.


Finally, a few fun pictures taken of the boys around camp and the park.


The one thing that I will remember about this campsite that I want to share before finishing up this post is the number of daddy long legs we had at tent pad.  


These guys were everywhere.  Big ones, small ones, all colors and shapes.  When we went to take down our tent two days later there were at least a bakers dozen on top of the tent under the rain flap.  Just to give you an idea of what we found:

Yep, there's four in a row just on that one side alone.  So keep your tent zipped or you may be having some visitors.  Next month we're planning to head to Grandfather Mountain and will most likely stay at our first private campground.  So be on the lookout for that review!

Also, In the next couple weeks, I'll post a few recipes from this trip that will make your mouth water without a lot of work.  

Happy Trails!


Friday, April 16, 2010

Huntington Beach State Park

Well, we survived (and even enjoyed!) our first camping trip of the season.  Huntington Beach State Park was great.  I loved that there was so much to do there and it made it even better to have the Scott's sister's family join us on the adventure.  We were there from Thursday through Sunday which, for me, was just enough to have fun but not so much as to give everyone complete burnout.  The campsites were nice, the bathrooms were clean and the beach was amazing.  My only complaint about the campground was that it really seemed to be RV heavy.  I only saw a handful of tent campers during our stay.  After a day of being there, I didn't really notice it as much, but I will say I still usually prefer to mingle among other tent campers. 

The first night we were there, we had a huge thunderstorm, so as you can imagine, we all slept in one tent together.  The boys started out in their own tent, but I knew the second I saw the first flash that we'd be having visitors.  And sure enough, Nicholas was so startled by the lightening that he left his younger brother alone in the small tent and just came running screaming, "Lightening!!  Let me in!!"  I'm not sure why, but it always seems to storm on our first night out camping.  Anyway, here are the tents set up at the site.  The big eight man tent and the where the boys slept for part of the first night and both of the following nights:


We enjoyed hanging out at camp at least a part of each day.  Scott's sister managed to snag a great campsite right next to the trail to the beach that also happened to be set back a bit and had a great climbing tree for the boys; both young and old.  If you camp there in the future, I recommend checking out site #33 and reserving it if you can.  It was definitely a prime location!  Here are a couple shots from around camp:


So I mentioned the fabulous beach above and I wasn't kidding.  I love South Carolina Beaches.  The sand is amazing and the waves are so mild that even my kids can enjoy them.  And of course you can't forget the tidal pools.  Endless fun for the younger crowd.  The first full day we were there, we headed down to the beach which is just a quarter mile hike through the woods.  It was so nice to have the ocean so close.  You could even hear the waves from your tent at night which was amazing.  The shells were all over as well so the kids had a blast hunting for ones they deemed special.  By the end of the trip they were all over our picnic table.  Here are a few shots of the beach:


On the afternoon of the first day, we took a hike over to one of the causeways where the birdwatching was supposed to be really great.  There are so many things to see in the marshes; they are just teeming with life!  The kids really enjoyed the hiking and the cousins got very into checking out their bird book to identify what they were looking at.


The next day we ventured over to BrookGreen Gardens.  What a beautiful garden!  They had plenty of activities for kids as well as adults.  I wish we could have spent more time in the actual gardens, but there was so much to do and not enough time to get it all done, so we focused on the activities we thought the kids would enjoy the most.  We first headed to the zoo portion of the gardens.  While the zoo is somewhat small overall, there are some really neat parts to it.  I really loved the two bird enclosures they had set up.  One was for water birds and the other was for the raptors.  You were actually able to walk right into the enclosure and view the birds up close and all the enclosures contained naturally occurring waters, swamp, etc. which I thought was really innovative.

After the zoo, we ventured back to the low country center and checked out the Discovery Center with kid's activities for my two oldest.  They really enjoyed hanging out in there and spent a good hour trying out all the different projects they had to offer.  When they wore out from that, we went to an animal show talking about the native animals of the area; they even let you touch them all which was pretty neat.  The piece of it that I watched had a skunk, turtles, and a bird.

Finally we wrapped up our day with a trip through the butterfly exhibit.  This was neat but I have to say I was a tad disappointed that they only had three different types of butterflies on display.  Usually when I've gone to an exhibit like this in the past there have been several types of butterflies to view.  None the less, the boys enjoyed it and that's what matters most.  Here are a few pictures of the trip to Brookgreen Gardens:


Finally, I had to share one of my favorite shots of the trip.  This was at the end of the final afternoon when I knew everyone was starting to feel the effects of a non-stop spring break.  I asked Nick and Alex to pose for the camera and here's what they gave me:


Do you think we sufficiently burned them out?!  Of course Alex is already asking when the next trip is going to be and talking about how much he loved the camping trip, so I know it was a success despite the worn out little rugrats that emerged from our extended weekend expedition.

Finally I wanted to mention that most of the meals turned out great.  I say most because we did have one dessert disaster.  I have learned from it though and hope to get it better the next trip so stay tuned.  I have a couple meals that did turn out yummy and I'll plan to share them here before our next camping trip in May.

Overall we had a blast at this park and I would highly recommend it as a family friendly camping destination.  Next trip, Stone Mountain!  We'll be heading there on Memorial Day weekend.   Thank for checking in and Happy Trails!

Tuesday, April 6, 2010

Camping Time!

Yay!  Our first camping trip is finally upon us and I can hardly wait to get out to the site.  We'll be heading to Huntington Beach State Park for a little fun at the beach. 

I have already planned the meals and bought the groceries.  Our dinners while we're there are the Easy Peasy Herbed Fish, Chicken Shish Kabobs, and Potato Kielbasa Skillet Dinner.  I'll be sure to add those recipes to the site with pictures after we get back from our trip.  I like to keep lunches and breakfasts a bit easier, simply because with three kids aged 5 to 1, one fully cooked meal at the campsite is about all I can handle.  So lunches will be sandwiches, fruit and chips and breakfasts will be cereal, organic toaster pastries (a special treat that we only get when we go camping) and fresh fruit.  And of course we need desserts and in betweens.  In case your wondering what in betweens are, I consider them the stuff you have in between meals, such as trail mix, granola bars and cheese and crackers.  For dessert I'm whipping up a batch of the Best Chocolate Chip Cookies.  Ever. (Look for this recipe next week on Mommie Cooks), some rice krispie treats for the boys, and I may try my hand at one "over the campfire" dessert.  I'm thinking about a three ingredient dessert; cake mix, fruit, and butter cooked over the campfire.  Although, I prefer not to used a boxed cake, so I may create my own cake mix before we head out the door on Thursday.  I'm also looking forward to trying out my new dutch oven!

The two older boys will be bringing their own tent again along with their star guides and bird books (we've heard this area is one of the best birding areas in the country).  The younger one will be living life in the pack and play  and the baby carrier as he's not walking yet.  I was hoping he'd get there in time for this trip, but no such luck. 

Does anyone else have a first camping trip of the season coming up?  I'd love to hear where you're planning to go and what your bringing to make your outing a special one!  Have a great week and I'll be back starting next week with all kinds of goodies to talk about!

Sunday, March 7, 2010

Baby carriers for the outdoor family

I can't believe it's only one month until we head out on our first camping trip of the season!  It will be nice to be able to write about actual "camping adventures" again.  Until that time though, we've been taking advantage of  the weather warming up and have started to spend more time outdoors hiking around the area.  And as we all know, with little ones in tow, a baby carrier is absolutely necessary if you want to go off the paved road.  So, in the spirit of upcoming spring and summer hikes, I thought it might be time to talk a bit about baby carriers.  This is a topic that's near and dear to my heart because I actually started up and ran my own baby carrier business with a friend for a short time, so I feel like I probably have more knowledge than the average Joe (or Josephine as the case may be.)

The day of the Baby Bjorn being your only choice for a baby carrier are gone.  Today there are hundreds of different types and styles to choose from.  Here are a couple of things to think about when choosing a baby carrier:

1.  Will you use it solely for hiking or will you use it for other activities as well? 

2.  Where do you feel most comfortable having the weight distibuted.  Do you prefer having it hit your shoulders, or would it work better if you had the weight on your hips? 

3.  How old is your baby?  Is he/she holding their head up yet?  Sitting up on their own?  Or are you perhaps looking for more the toddler age?

4. Do you want the ability to have him/her on your front and back or are you ok with just having him/her on your back?

5.  Are you looking for a carrier that can be operated easily by one person, or one that may require a second set of hands?

6.  How much are you looking to spend?

One of the more popular carriers for hiking is Kelty.  We have a Kelty carrier that we use solely for hiking while camping.  What I love about this carrier is that it can hold up to 50 pounds so we could easily use it up until our middle child, Alex was 3.5 years old.  It puts the weight on your hips which makes for a much more comfortable hike with the older heavier child.  The main downsides to these carriers, is that they are pretty bulky for every day use.  They also, in my opinion, require two sets of hands to get the child in proper and up on your back.  They are a bit pricey as well, unless you can pick one up second hand.  That, being said, for the older toddler, this carrier has been a necessity and a lifesaver for us.

A couple other choices that you may or may not have heard of, but that can be great for hiking and everyday use are the Ergo and Beco.  I have tried both of these carriers and like them both.  Similar to the Kelty, they place the weight of the child at your hips and not your shoulders.  The main difference you'll find with these two carriers is that there is no metal support like there is in the Kelty.  These carriers have been designed with everyday use in mind.  I prefer these carriers for the 2 year and under crowd because they can be worn on either the front or back and they are much easier for a single person to maneuver.  They are also a bit more affordable.  However, the downside to these carriers is that they don't have as much storage for diapers, drinks, snacks etc. as the Kelty has and I do think that for longer hikes and heavier children, the Kelty will support better over the long term.  Seeing as we have three children, and needed to carry two until just this year, having one of these carriers in addition to the Kelty was perfect for us.  I use this carrier other places besides hiking as well; at museums, zoos, the grocery store; you name it.  It's a wonderful way to carry a little one around when you're lacking that second set of hands and/or a smooth ride for the stroller.

This is only the tip of the iceberg with regards to carriers.  There are many other types; mei tais, buckle tais, ring slings, etc.  Some of these are ok for hiking and others are better for day to day use.  If you are interested in learning more about the different types of baby carriers available, I recommend you visit The Babywearer website.

Happy Trails!

Alex in one of my carriers; the Hapai Baby

Friday, February 26, 2010

Trail Mix Musings

Inspired by a fellow blog reader, I decided to do a post on trail mix.  And honestly, what's not to like about trail mix?  It's healthy, it's fun, it's versatile, and it's easy to make.  There are so many ways to make trail mix that you could create a different mix every day for a year and still not run out of choices to make it unique.  All this talk is making me hungry so let's get started!

Trail Mix typically consists of dried fruits, nuts, grains, seeds, and sometimes chocolates. It was originally created for the outdoor enthusiast because nuts and fruit offer a good combination or protein and sugar to keep you energized and moving forward.  Today, it's eaten everywhere from the great outdoors to the office for a mid afternoon pick-me-up.  Some common ingredients that tend to be in most trail mixes include peanuts, raisins, almonds, cashews, and M&M's.  But why stop there? There are so many great additions that you can add to make a trail mix your own personal favorite.  How about dried cherries?  Sunflower seeds?  Or maybe yogurt covered raisins?  The possibilities are endless.

When I set out to make a trail mix, I typically like to head over to my local natural foods store where I can find bulk bins with all my favorite ingredients.  This way I can get a little or a lot of each ingredient and save money while doing it because I only buy what I need. Sometimes they have pre-made trail mixes in the bins as well if you'd rather just get something that's already been mixed.  Here in Charlotte I tend to like Healthy Home Market as they have the largest selection of bulk bins in the area.  Find something similar in your area and check it out.

If you want to go a bit more gourmet you can visit one of several online "create your own" trail mix shops including Nutty Idea and You Trail Mix.  You can also make trail mixes that have a bit more substance to them, such as a coating of yummy goodness that gives them additional flavor.  Here are a couple gourmet recipes to try the next time you're looking for something a little different!

Carmel Goodness Trail Mix

9 Cups of Rice Chex Cereal
1 cup of brown sugar
1/2 cup butter (1 stick)
1 tsp vanilla
1/4 tsp baking soda
1/4 cup maple syrup
1 cup each of your favorite mixings (ie. nuts, dried fruit, or chocolate)

Spread cereal on a greased baking sheet.  In a medium sauce pan melt butter.  Add brown sugar, maple syrup, and vanilla and bring to a boil.  Boil for one minute, stirring constantly.  Remove mixture from heat and stir in baking soda.  Pour mixture over cereal and stir until all pieces are coated.  

Place mixture in a preheated 250 degree oven for 40-50 minutes, stirring every 15 minutes. Pull out of oven and let cereal cool for 5 minutes.  Then stir in addition mixings.  Allow to cool completely and then break into chunks.  Store in an airtight container.  Enjoy!


Very Cherry Trail Mix

1 Cup of uncooked Oats
2/3 Cup of Chopped Dried Cherries
1/4 Cup Chopped Almonds
1/4 tsp Salt
1 Tbsp Butter, melted
1/4 Cup Honey

Grease a large jelly roll pan.  In a large bowl mix together oats, cherries, almonds and salt.  Pour butter and honey over the top of mixture and stir until evenly coated.  Spread evenly onto greased pan.  Place in a 350 degree oven for 20 to 25 minutes stirring occasionally.   Let Cool.  Break into pieces and store in an airtight container.  Enjoy!


Sunday, February 21, 2010

Getting out locally

Not every weekend can be dedicated to camping, but that doesn't mean you can't get out and experience nature in your local area on a regular basis.  In a time of never ending tv, video games, cell phones and the like, it's important to set aside time for kids to get outside and explore their surroundings away from all the noise of modern technology.  There are so many great areas for getting out of the house and exploring, and chances are, there are many places in your own town that you don't even know of yet.  Make it a challenge to find one new place that you've never been before.  Ask friends and  neighbors where they enjoy spending their outdoor time.  Check around for local outdoor clubs, look in the local paper for outdoor activities or check out your local library for nature books relative to your city or state.  I know that after searching online for outdoor venues in Charlotte, I stumbled upon several clubs and outings that I hadn't even known existed until I took the time to research them. 

Our family's favorite local outdoor activity is to visit our local greenways and explore the outdoors while we walk.  For my boys, every visit is a new hike.  My oldest enjoys treasure hunting while we go. He's found intact beetles shells, bird feathers, frogs, and more.  My husband and I enjoy the feeling of being outside and the sense of renewal it gives us.  Nothing lifts the spirits more than a walk in nature. 

The entrance to McMullen Creek Greenway in Charlotte

So the next time you're sitting around on a Sunday afternoon with your kids begging to play the wii yet again and wondering what to do with your time, get out and enjoy the day.  Even if it's just a walk through your neighborhood.  You'll be amazed at how much better you feel and at the same time, you'll be teaching your children more about the world around them and how to have fun in the outdoors without the use of an ipod, cell phone or game boy.

Some local outdoor opportunities in Charlotte include:


Charlotte Greenways
The Charlotte Outdoor Parents Meetup Group
Charlotte Park System
Charlotte Nature Preserves